Reading RPLS is free for the whole profession. Members post, reply, and get the members-only rooms.

Notifications
Clear all

Topic starter
Translate
▼
English
Spanish
French
German
Italian
Portuguese
Russian
Chinese
Japanese
Korean
Arabic
Hindi
Dutch
Polish
Turkish
Vietnamese
Thai
Swedish
Danish
Finnish
Norwegian
Czech
Hungarian
Romanian
Greek
Hebrew
Indonesian
Malay
Ukrainian
Bulgarian
Croatian
Slovak
Slovenian
Serbian
Lithuanian
Latvian
Estonian
I've been wanting an additional mirror illuminator for my Wild T2. The theodolite was an eBay purchase and unfortunately came with only one illuminator. (It does get old to hold up a white card to the side of the instrument.)
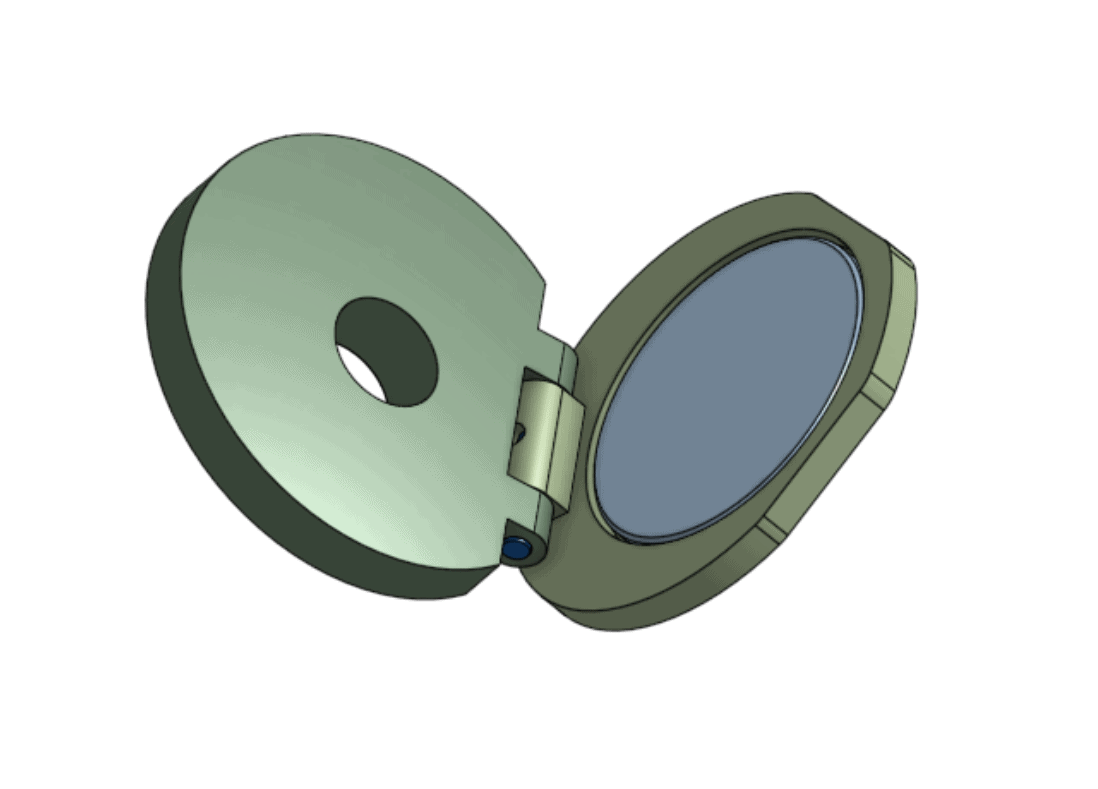
Karaco has them for $75, but for those who don't need originals, it's nice to have a less expensive source. So I've made a CAD model available:
Onshape (need to sign up for a free account to view/copy/modify/download):
Youmagine (no need for an account to view/download):
https://www.youmagine.com/designs/mirror-illuminators-for-wild-theodolites
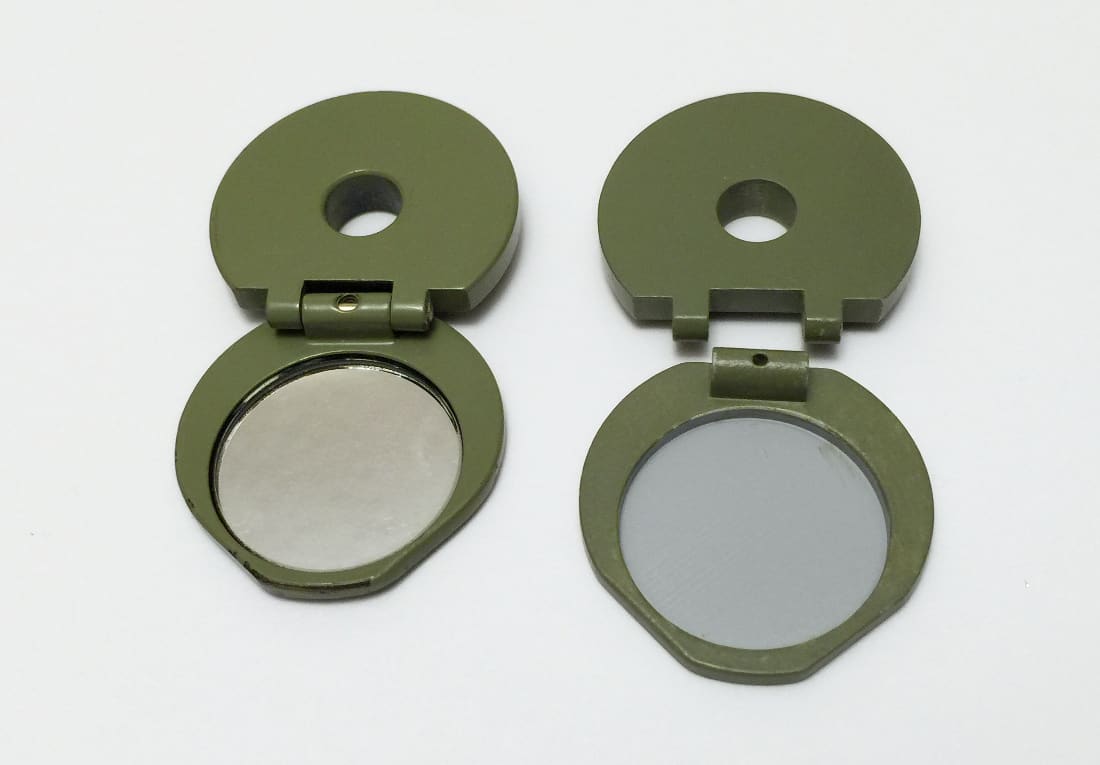
A print from Shapeways in their "frosted ultra detail" acrylic material turned out quite well. I also did an ABS prototype on my FDM printer which was perfectly functional but a little ratty-looking for the purpose because of the visible layers. The photo shows the original on the left and the painted Shapeways parts on the right. One needs to mix some acrylic artist's paint to the appropriate shade of "Leica green".
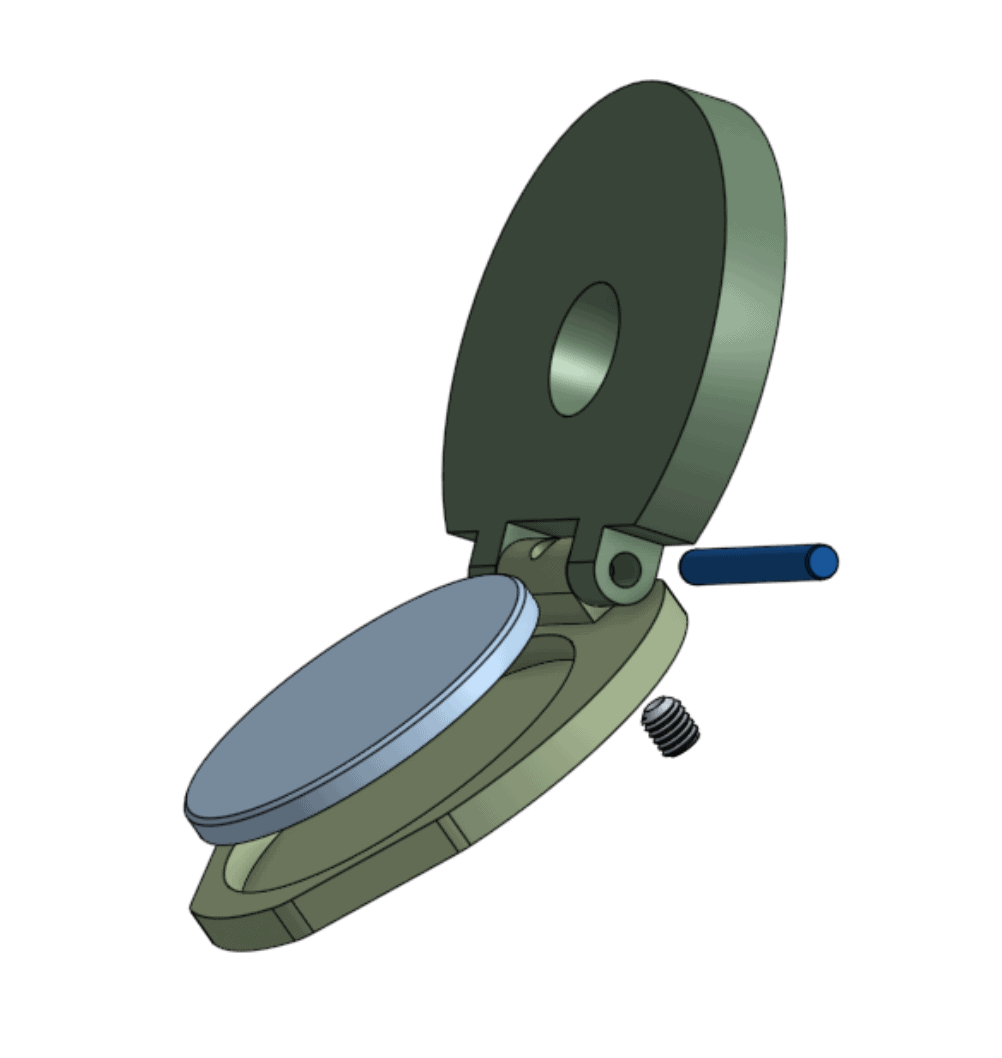
Bill of materials:
- 3D-printed mirror cell and base
- Dowel pin, McMaster 91585A016
- Setscrew, McMaster 92029A093
- Mirror, 25.4 mm diameter, 1.5 mm thick, http://www.amazon.com/gp/product/B014Q7AVKG
- Thin, high-tack double-sided adhesive tape to affix mirror to cell
Some light sanding/reaming of the hinge holes is necessary for a good dowel-pin fit; also the setscrew hole should be manually tapped M2.5x0.45 (although theoretically the internal thread could be 3d-printed).
The CAD model has as parameter the diameter of the mirror. The original part has a mirror with diameter 23.5 mm, but small circular second-surface mirrors are more readily available in 1-inch (25.4 mm) diameter, so the CAD model can be adjusted for that.
CNC milling in bronze would also be a reasonable way to go, for better durability.
Cheers,
Peter
Posted : February 13, 2016 2:18 am

Translate
▼
English
Spanish
French
German
Italian
Portuguese
Russian
Chinese
Japanese
Korean
Arabic
Hindi
Dutch
Polish
Turkish
Vietnamese
Thai
Swedish
Danish
Finnish
Norwegian
Czech
Hungarian
Romanian
Greek
Hebrew
Indonesian
Malay
Ukrainian
Bulgarian
Croatian
Slovak
Slovenian
Serbian
Lithuanian
Latvian
Estonian
Nice work!
Posted : February 13, 2016 8:57 am

Translate
▼
English
Spanish
French
German
Italian
Portuguese
Russian
Chinese
Japanese
Korean
Arabic
Hindi
Dutch
Polish
Turkish
Vietnamese
Thai
Swedish
Danish
Finnish
Norwegian
Czech
Hungarian
Romanian
Greek
Hebrew
Indonesian
Malay
Ukrainian
Bulgarian
Croatian
Slovak
Slovenian
Serbian
Lithuanian
Latvian
Estonian
I"m ASTONISHED at the talent on this site, it's incredible.
Great post pmonta!
ps: are you one of those who can repair the machines on "How It's Made" that produce a million Pop Tarts a minute? 🙂
Posted : February 13, 2016 9:34 am

Translate
▼
English
Spanish
French
German
Italian
Portuguese
Russian
Chinese
Japanese
Korean
Arabic
Hindi
Dutch
Polish
Turkish
Vietnamese
Thai
Swedish
Danish
Finnish
Norwegian
Czech
Hungarian
Romanian
Greek
Hebrew
Indonesian
Malay
Ukrainian
Bulgarian
Croatian
Slovak
Slovenian
Serbian
Lithuanian
Latvian
Estonian
I've come up with two workable alternatives that do not involve 3d printing.
1. Usin a putty called "Sculpy" make a mirror holder. This stuff hardens when baked.?ÿ I formed the holder basicaly like the example in this article.?ÿ Then instead of a pin and base I used some wire and a 9mm shell case that I had deprimed and reamed out as wide as I could.?ÿ The wire wraps around the extractor groove then forms a loop alowind the mirror base to set flush against the 9mm case.?ÿ (Note you may have to trim the case to about 1/2 normal length) and file down the open edge to get it to fit. Adjust the wire so the mirror in its holder can be angled and rotated.
?ÿ
2. Using a sliver of the synthetic cork found in modern wine bottles.?ÿ Cut a slice of cork from a modern synthetic wine bottle cork so that it is aproximatly as long as the mirror (I used some mirrors from e-bay 1 inch in dia.?ÿ Pierce the narrow edge of the cork with a heavy needle. Prepair the 9mm case and wire and then run the wire thru the cork.?ÿ Using gorilla glue glue the mirror to the cork so it holds the mirror. In both models the heavy bailing wire and 9mm case were used.?ÿ Because the wire I used is very soft I found it necessary to wrap some black fishing line around the wire tangent to the 9mm case to hold it hard enough so the mirror does not rotate to easily.
Posted : May 22, 2018 6:53 am