
Activity Feed › Discussion Forums › GNSS & Geodesy › Create your own NRTK?

I have successfully done this with an R6-4 as a base connected to my SNIP server via serial cable. My rover is an R2 and Trimble Slate with Access. Slate has an AT&T sim card.
- Setup R8-s as a base using web interface. Broadcast output CMRx over serial port. (Port 2 for R6-4.)
- Connect serial cable from R8-s to computer using usb to serial adapter
- Start SNIP, Add Serial Stream
- Select com port and configure port settings (38400,8,none,1,none,500 works for me)
- Name your mount point and uncheck parse RTCM
- Configure mount point
- Data Format – Trimble CMR
- Select GNSS Types (GPS, GLONASS, etc)
- Check “Hide this Entry in the Caster Table”
- Under the Serial Streams tab, right click on your mount point and hit connect
- Under Caster and Clients tab, select mange user accounts and create a new user account name and password. Take note of the listening IP address and port on the right side of the screen.
- Go to your firewall settings and open that port. Depending on your IT setup, you may have to forward that port to the internal IP address of that computer.
- Open Trimble Access on rover
- Create new GNSS contact for base station
- Contact Type – Internet Rover
- NTRIP Configuration – check use NTRIP (I also checked use NTRIP 1.0, but don’t know if that’s necessary)
- Enter user name, password, static IP, port
- Create new survey style
- Rover Options
- Survey Type – RTK
- Broadcast Format – CMRx
- Rover Data Link
- Type – Internet Connection
- GNSS contact – new contact just created
- Rover Options
- To test, go to General Survey
- Measure
- Select the new survey style you just created
- Don’t select Start Base Receiver, as it’s already started
- Select Measure Points
- It should connect to the internet then show the mount point listed in a table; hit enter to select the mount point
- A globe with a green check mark should show in the Access status window when the connection is successful
- Create new GNSS contact for base station
This setup works flawless for me. Troubleshooting is pretty easy. If it works for a while then all of a sudden won’t connect for some reason, I’ll just delete the serial stream in SNIP and create a new one. Works every time.
 Posted by: andrewm
I have successfully done this with an R6-4 as a base connected to my SNIP server via serial cable. My rover is an R2 and Trimble Slate with Access. Slate has an AT&T sim card.
- Setup R8-s as a base using web interface. Broadcast output CMRx over serial port. (Port 2 for R6-4.)
- Connect serial cable from R8-s to computer using usb to serial adapter
- Start SNIP, Add Serial Stream
- Select com port and configure port settings (38400,8,none,1,none,500 works for me)
- Name your mount point and uncheck parse RTCM
- Configure mount point
- Data Format – Trimble CMR
- Select GNSS Types (GPS, GLONASS, etc)
- Check “Hide this Entry in the Caster Table”
- Under the Serial Streams tab, right click on your mount point and hit connect
- Under Caster and Clients tab, select mange user accounts and create a new user account name and password. Take note of the listening IP address and port on the right side of the screen.
- Go to your firewall settings and open that port. Depending on your IT setup, you may have to forward that port to the internal IP address of that computer.
- Open Trimble Access on rover
- Create new GNSS contact for base station
- Contact Type – Internet Rover
- NTRIP Configuration – check use NTRIP (I also checked use NTRIP 1.0, but don’t know if that’s necessary)
- Enter user name, password, static IP, port
- Create new survey style
- Rover Options
- Survey Type – RTK
- Broadcast Format – CMRx
- Rover Data Link
- Type – Internet Connection
- GNSS contact – new contact just created
- Rover Options
- To test, go to General Survey
- Measure
- Select the new survey style you just created
- Don’t select Start Base Receiver, as it’s already started
- Select Measure Points
- It should connect to the internet then show the mount point listed in a table; hit enter to select the mount point
- A globe with a green check mark should show in the Access status window when the connection is successful
- Create new GNSS contact for base station
This setup works flawless for me. Troubleshooting is pretty easy. If it works for a while then all of a sudden won’t connect for some reason, I’ll just delete the serial stream in SNIP and create a new one. Works every time.
Thank You Very much for that. Will check ASAP
So I had a look on the web configuration guide from Trimble website and it shows that you can assign a com port to bleutooth and enter the web ui via bluetooth. So i thought to ask if it is possible as well to connect to snip via bluetooth instead if having to use that legacy serial cable
One more thing. I just found out that free version of Snip stops functionality after one hour and you have to reset the app. Can anyrhing be done about that
- Posted by: therock003
So I had a look on the web configuration guide from Trimble website and it shows that you can assign a com port to bleutooth and enter the web ui via bluetooth. So i thought to ask if it is possible as well to connect to snip via bluetooth instead if having to use that legacy serial cable
One more thing. I just found out that free version of Snip stops functionality after one hour and you have to reset the app. Can anyrhing be done about that
I haven’t tried bluetooth, so I can’t help there.
Only the features available in the Basic version of SNIP are disabled after an hour with the free version. Free version features, including serial streaming, keep working.
Are you sure? Because i just run it yesterday and left it idle, and after about an hour i went to try and test your steps, it wouldn’t even let me add the serial stream
- Posted by: therock003
Are you sure? Because i just run it yesterday and left it idle, and after about an hour i went to try and test your steps, it wouldn’t even let me add the serial stream
From the SNIP website:
“SNIP is available in several different models to suit your needs. A free evaluation download allows exploring SNIP??s primary features. In this mode, each time SNIP, is started, users have a limited one-hour evaluation period with all of the features in the Basic model enabled. The application can be upgraded to the Lite model at any time free of charge by completing a brief in-app registration. The Basic and Pro models are obtained by way of a simple cart checkout process. An Enterprise model is available to support various unique needs.“
So you have to register the evaluation version to enable the Lite version.
Trying to establish a bluetooth-serial connection in order to enter the unit configuration but so far seems impossible. Followed this guide
I’m on Win10 but thats the latest they go on their site (along with Vista and XP)
So when i get to the step of creating a modem and assigning the bluetooth com port, it appears i dont get to choose the existing port.
As you can see from here, serial port should be com port 13
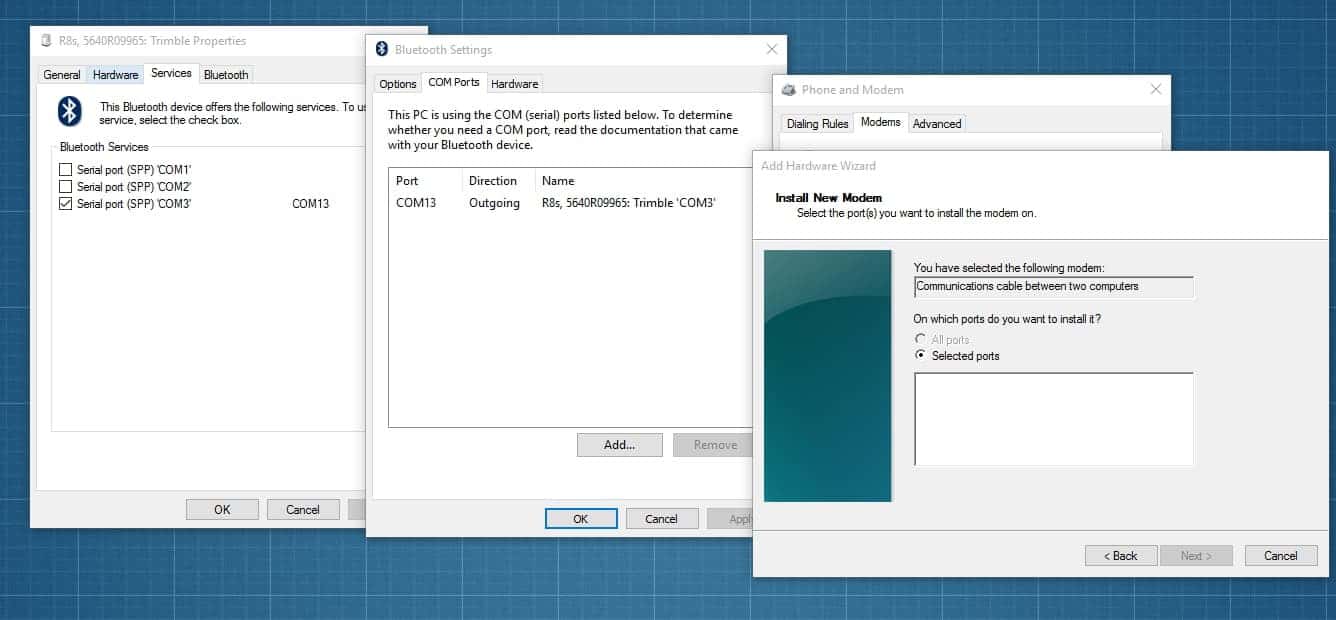
It seems i get no option for ports on outgoing connection. I only get a selection for incomming. I added some ports fro incomming and they appear but no matter what com 13 is not an option for the modem creation

@andrewm Hi, thanks a lot for your method description. I only still have a doubt about reference base coordinates.
I pushed out my serial stream using the RTK2go button in the pushed out tab of SNIP software. Using this method the mountpoint appeared in mountpoint list and I started to receive corrections on rover controller.My problem now is to set coordinates of my reference base. I couldn??t get a fixed solution and when I verify base reference coordinates I realize that were in California (34?ø11’14.58″N 117?ø18’55.87″W) instead my base location in Cordoba City (31?ø25’12.50″S 64?ø10’48.16″W).Please, could you explain me how could I set my base reference coordinates? I searched in all SNIP web without success.

Log in to reply.